 Free Palm Reading
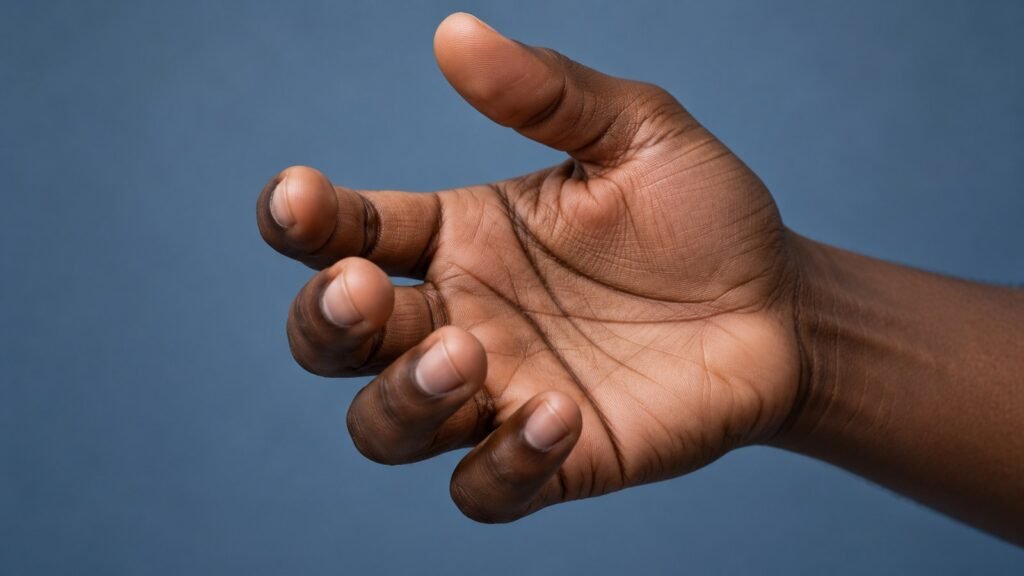
Glare hides palm creases in photos because the shiny surface of the skin reflects light directly into the camera lens, causing bright spots that obscure the fine lines. Uneven lighting and reflective angles increase this effect, making it difficult to see palm creases clearly. Careful control of light and angle is essential for capturing palm details without glare interference.
Understanding How Glare Obscures Palm Creases
When photographing palms, glare occurs because the skin’s natural oils and moisture create a glossy surface. Light hitting this surface reflects in a concentrated manner, often producing bright, washed-out areas in the image. These bright spots overpower the subtle shadows that define palm creases, essentially hiding the lines inside a pool of reflected light. The angle at which the light source hits the hand and the camera lens plays a crucial role; direct frontal lighting usually intensifies glare, while side or diffused lighting softens it.
Moreover, palm creases are shallow grooves that rely on shadow contrast to be visible. Glare throws off this contrast by flooding these grooves with light, which removes the shadows and reduces the line definition. This interplay among light angle, skin texture, and camera position explains why sometimes cracks or wrinkles on other surfaces show clearly but disappear under direct bright light on the palm.
How to Position Lighting and Camera to Avoid Glare
Avoiding glare requires deliberate lighting and camera placement. Instead of direct light aimed at the palm perpendicular to the camera lens, try positioning the light at an angle of about 45 degrees off to the side or top. This slanted light accentuates shadows within palm creases rather than reflecting straight back into the lens. Using natural diffused daylight from a window can help reduce harsh reflections compared to artificial bulbs or direct sunlight. Overcast days or shaded areas provide softer light ideal for detail capture.
Also, experimenting with the angle of the hand relative to the camera matters. Tilting the palm slightly away from the camera reduces the chance of direct reflection. Combining angled light and hand tilt will produce visible creases with less glare. If possible, use a polarizing filter on your camera lens—this can reduce surface reflections by blocking certain light waves, improving line contrast visibly without adjusting the actual lighting setup.
Common Mistakes When Photographing Palm Creases
Many beginners unknowingly increase glare by using a flash directly on the palm or positioning a single overhead lamp without regard to reflection angles. These setups often create uniform bright areas that blur fine lines instead of highlighting them. Another mistake is placing the palm fully flat while facing the camera and light source straight on, which maximizes mirror-like reflection from the oily skin surface.
Additionally, excessive zoom or low-resolution cameras may fail to capture subtle crease detail regardless of glare. Some try to boost brightness or contrast digitally afterward, but this can amplify glare areas and distort line appearance rather than clarify. Lastly, neglecting to clean the palm before photographing risks extra shiny patches from sweat or lotion that worsen glare unpredictably. A clean, dry palm surface combined with considered lighting improves results significantly.
Step-by-Step: Observing Palm Creases Without Glare Interference
- Prepare a clean, dry palm. Wash and dry hands to minimize oily gloss.
- Choose diffused light. Use indirect daylight or a soft light source angled approximately 45 degrees off the camera’s line of sight.
- Hold palm at a slight angle. Tilt the hand so it’s not flat facing the camera; a 10-20 degree angle reduces direct reflection.
- Use a neutral background. Avoid bright colors that might reflect unwanted light onto the hand.
- Focus camera carefully. Maintain a steady shot with sufficient resolution to capture fine palm lines.
- Review and adjust. Check for glare spots in the preview; reposition light or hand angle as needed.
This method ensures strong contrast between creases and surrounding skin textures while minimizing reflective glare.
Fictional example: Photographing Palm Creases at a Family Gathering
Jane wanted to share her palm lines with her curious niece during a sunny afternoon picnic. She first noticed her photos showed large white glare spots washing out the fine lines across her palm, making the creases invisible. Remembering some tips, Jane moved to a shaded spot under a tree, where the sunlight was indirect and softer. She tilted her hand slightly and asked her niece to take the picture from a side angle. The niece also avoided using the phone’s flash. The resulting photo showed clearer, softly shadowed palm creases with minimal glare. Jane was pleased that the traditional symbolism in those lines was now easier to see and explore together as light play rather than fixed predictions.
Checklist: Avoiding Glare for Clear Palm Line Photos
| Issue | Common Cause | Solution |
|---|---|---|
| Bright white spots on palm | Direct flash or harsh direct lighting | Use indirect or diffused side lighting |
| Lines not visible or washed out | Camera or palm perpendicular to light source | Tilt hand/angle light 30-45 degrees |
| Uneven shiny patches | Excessive skin oil or sweat | Wash and dry hands before photo |
| Blurry or pixelated lines | Low camera resolution or shaky shot | Use a steady high-res camera and focus carefully |
Practical Exercise and Three Actionable Takeaways
Take a photo of your palm following these steps to observe creases clearly and assess how glare affects visibility:
- Find natural indirect light near a window but avoid direct sun.
- Wash and dry your hand to reduce shine.
- Hold your palm at a slight angle (about 15 degrees) from your camera lens.
- Use your phone or camera with no flash or with the flash turned off.
- Review the photo, adjusting your hand or light angle if glare persists.
To summarize:
- Control lighting: Prefer soft, indirect light over direct or flash.
- Adjust angles: Tilt your palm and the camera to avoid head-on reflections.
- Prepare the skin: Clean and dry your palm to minimize oily glare.
Practice this process to become more confident in photographing palm lines accurately for traditional reading or personal journaling. For a guided start, explore the steps at FreePalmReading.io.
Frequently Asked Questions
Why does my palm look shiny and hide lines in photos but not when I look directly?
When looking directly, your eyes perceive subtle shadows and texture dynamically. Photos flatten this perception, and shininess caused by skin oils reflects light into the camera lens, washing out fine crease detail, which is why glare appears more pronounced in images.
Can glare be completely eliminated in palm photos?
While glare can be greatly reduced by adjusting lighting and angles, it is rarely eliminated entirely due to natural skin reflectivity and environmental factors. Using diffused light, tilting the hand, and a polarizing filter can minimize glare significantly for clearer crease visibility.
Does glare affect the accuracy of traditional palm reading interpretations?
Glare affects how clearly lines appear in photos but does not impact traditional symbolism, which is based on observable shapes and lines. However, if glare obscures detail, it can hinder one’s ability to observe the palm properly; thus, reducing glare is critical for effective reading.
Are hand shapes or crease visibility reliable indicators of personal traits?
Hand shapes and palm lines hold meaning only within traditional belief systems and symbolism, not scientific fact. They do not reveal proven aspects of personality, health, or future; observing them can be an engaging way to reflect or entertain but not a reliable diagnostic tool.
Conclusion: Embracing Visual Nuance When Photographing Palm Creases
Capturing clear photos of your palm creases requires mindful attention to light, angle, and skin surface. Glare is a natural consequence of skin reflectivity that can mask important details traditionally used for symbolic interpretation. By managing lighting conditions—favoring soft, indirect illumination—and adjusting your hand’s position relative to the camera, you can significantly reduce glare and enhance line visibility.
Remember that palm creases and shapes are interpretations rooted in cultural history and personal reflection, not established facts. Appreciating the lines as shifting light and shadow helps maintain a curious and open mindset. With practice and these focused techniques, anyone can take photos that better reveal the intricate natural patterns in their palms, enriching the experience of traditional palmistry exploration.
Further Reading
- Cheiro’s Palmistry for All – A historical text outlining traditional palm line and hand shape symbolism.
- Palmistry: The Future in the Palm of Your Hand – An overview tracing historical and cultural aspects of palm reading as entertainment.
See what your own palm inspires
Bring these ideas to life with a reading focused on you. Choose a reading type and upload a clear palm photo to explore an encouraging interpretation.
Explore more palm reading and palmistry guides.